Sanding Hull Sides, Decks and Transom
A.) A random orbital sander with 80 to 100 grit is good for fairing the hull sides, decks, and transom. It also is good for sanding the new bungs flush after chipping them off with a chisel. Follow this sanding with 60, 80, maybe as high as 100 grit sanding by hand with the grain. Take your time and be sure to remove any swirl marks from the random orbital
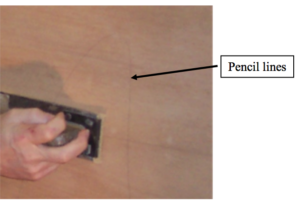
sanding. A helpful hint is to LIGHTLY rub a pencil up and down (against the grain) the hull sides.
Then sand until the pencil lines are gone. This assures you of not missing any area of the wood.
B.) Another technique is to do all hand sanding of the hull sides, decks, and transom. This is good because it gives you time to inspect the wood very carefully as you work. After stripping, sand the entire boat with 60 grit, followed by 80 grit, maybe as high as 100 grit. As mentioned earlier, the pencil lines work well. When a plank has been replaced and is surrounded by old wood, do not sand the new wood beyond the 60 grit. This leaves the new wood with more open grain to hold the stain, resulting in a closer color match to surrounding old wood.
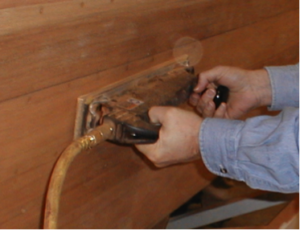
C.) Inline power sanding can also be used with the same 3 grits of sand paper.
D.) Be careful not to sand off the boot top markings.
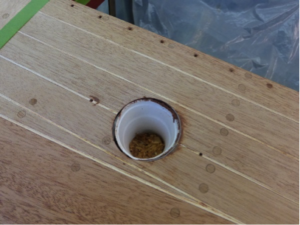
E.) To keep residue from going into the bilge via the vent holes or any other large holes in the deck here is a good tip: Place a Styrofoam cup in the hole then trim the top to fit just below the deck surface. This will catch debris and is easy to replace.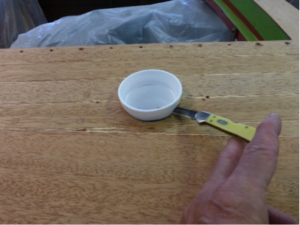
F.) Tape joints to prevent cross-sanding scratches. These scratches may not be noticeable at this time but will be quite obvious when stain is being applied.
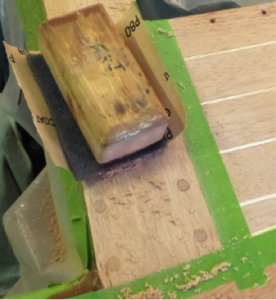
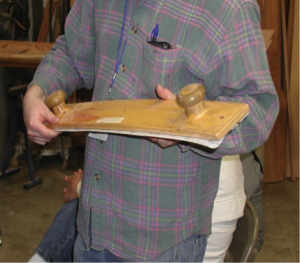
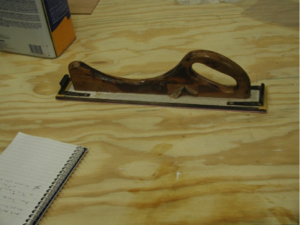
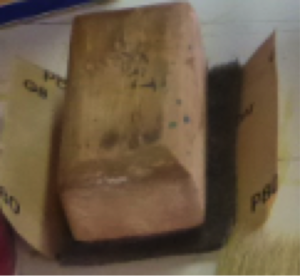
G.) Longboards are a big help when fairing the hull sides, decks and transom. I prefer the smaller one. Either one is available from Jamestown.
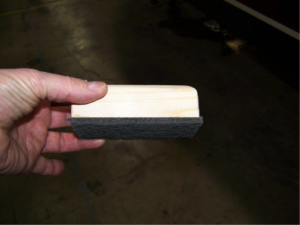
A smaller sanding block is easily made from a piece of 2×4, then glue a piece of Scotch Brite onto the bottom to act as a cushion
Now that the sanding of the hull sides, decks, and transom is completed it’s time to get ready to stain.


Recent Comments